Skip to content
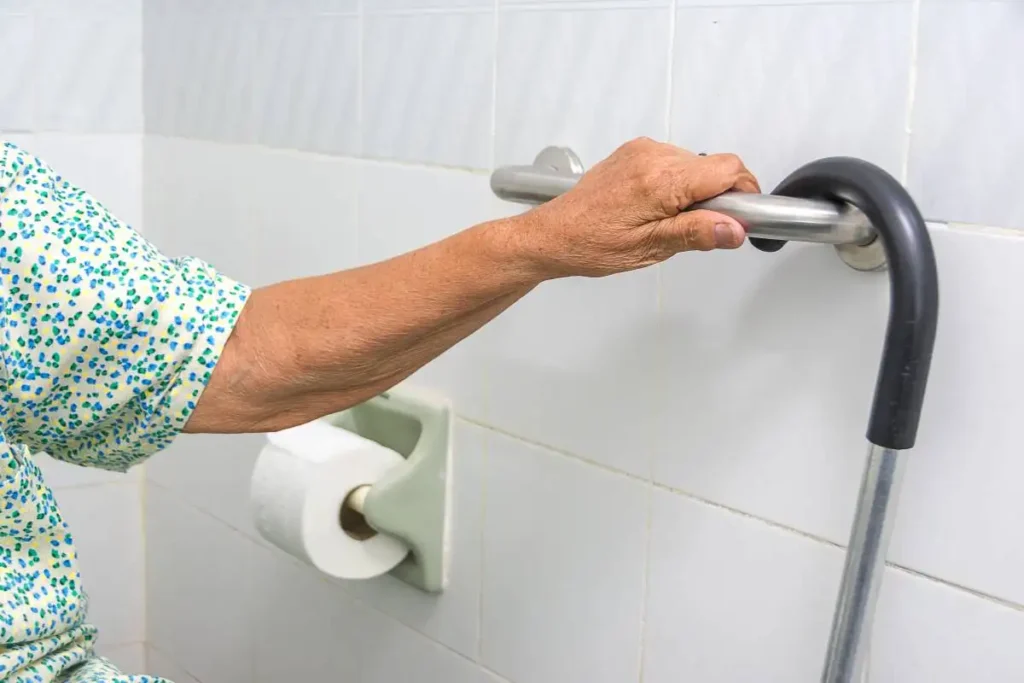
Falls are no joke for older adults. They can lead to serious injuries, loss of independence, and even long-term health problems. But here’s the good news: many falls are preventable with the right safety measures in place.
Grab bars are a key player in fall prevention. They give you something sturdy to hold onto when you’re getting in and out of the tub, using the toilet, or navigating slippery bathroom floors. Think of them as your personal safety net, always there when you need a little extra support.
But it’s not just about physical safety. Having grab bars installed can give seniors a major confidence boost. When you know you’ve got a reliable handhold nearby, you’re more likely to move around freely and maintain your independence at home.
Where Grab Bars Make the Biggest Difference
While grab bars can be helpful throughout the house, certain areas benefit the most:
- Bathrooms: This is the number one spot for grab bar installation. They’re crucial near toilets, in showers, and around bathtubs.
- Staircases: A well-placed grab bar can make climbing stairs feel much safer.
- Entryways: Having support when stepping in or out of your home is a game-changer, especially in bad weather.
- Bedrooms: A grab bar near the bed can help with getting up and down safely.
By focusing on these high-risk areas, you’ll get the most bang for your buck when it comes to fall prevention.
Choosing the Right Grab Bars for Your Home
Not all grab bars are created equal. To get the most benefit, you need to choose ones that fit your specific needs and space. Let’s break down what to look for when shopping for grab bars.
Materials and Finishes That Last
Durability is key when it comes to grab bars. After all, you’re trusting these devices with your safety. Stainless steel is a popular choice because it’s strong, rust-resistant, and easy to clean. But don’t rule out other options like brass or aluminum—they can be just as sturdy and might better match your bathroom decor.
The finish on your grab bar matters too. A textured or knurled surface gives you a better grip, especially when your hands are wet. Some bars come with a powder-coated finish that’s both slip-resistant and stylish.
When you’re browsing grab bars, look for ones that can support at least 250 pounds. This ensures they’ll be strong enough for most users, even in an emergency situation.
Size and Shape Considerations
Grab bars come in various lengths and diameters. The most common sizes are 12, 18, 24, and 36 inches long. The length you choose depends on where you’re installing it and how much coverage you need.
For diameter, 1.25 to 1.5 inches is the sweet spot for most people. This size is comfortable to grip for hands of all sizes. Some bars have a slightly flattened top surface, which can be more comfortable for longer periods of use.
As for shape, straight grab bars are the most versatile. But don’t overlook angled or L-shaped bars for specific applications. These can be particularly helpful in shower corners or next to toilets.
Special Features to Look For
Today’s grab bars offer more than just basic support. Some models come with built-in features that can make your life easier:
- Foldable designs: These bars can be folded up against the wall when not in use, saving space in tight bathrooms.
- Integrated shelving: Some grab bars double as shelves, giving you a handy spot to store toiletries.
- Suction cup bars: While not as secure as permanently installed bars, these can be a good temporary solution or for travel.
- Lighted bars: Illuminated grab bars can serve as nightlights, making nighttime bathroom trips safer.
When choosing grab bars, think about your specific needs and how these features might benefit you in daily life.
Planning Your Grab Bar Installation
Before you start drilling holes, it’s crucial to plan out your grab bar installation carefully. This step can make the difference between a secure, effective setup and one that doesn’t quite hit the mark.
Assessing Your Space and Needs
Start by taking a good look at the areas where you want to install grab bars. Consider your daily routines and where you might need extra support. If you use a wheelchair or walker, factor in how you’ll approach and use the grab bars.
Measure the spaces carefully. You’ll want to ensure there’s enough clearance around the grab bar for comfortable use. Don’t forget to account for any obstacles like towel racks or light switches that might interfere with placement.
Think about your height and reach as well. Grab bars should be positioned where you can easily grasp them without straining. For most adults, a height of 33 to 36 inches from the floor works well, but adjust as needed for your personal comfort.
Mapping Out Optimal Placement
Now that you’ve assessed your space, it’s time to map out where your grab bars will go. Here are some guidelines for common locations:
- Toilet area:
- Place a bar on the wall beside the toilet, about 8 to 10 inches from the edge of the bowl.
- Consider a second bar on the opposite wall or behind the toilet if space allows.
- Bathtub:
- Install a horizontal bar along the side wall, about 8 to 10 inches above the tub rim.
- Add a vertical bar at the edge of the tub for getting in and out.
- Shower:
- Place a horizontal bar on the back wall, about waist height.
- Add a vertical bar near the shower entrance for stability while stepping in and out.
Remember, these are general guidelines. Your specific needs might call for different placements. The key is to position the bars where they’ll provide the most support during your daily activities.
Tools and Materials You’ll Need
Getting ready for installation? Here’s a list of tools and materials you’ll likely need:
- Grab bars (chosen based on earlier considerations)
- Drill and drill bits
- Stud finder
- Level
- Pencil for marking
- Measuring tape
- Screwdriver
- Anchors (if not drilling into studs)
- Silicone caulk for waterproofing
Having everything on hand before you start will make the installation process much smoother. Don’t skimp on quality when it comes to tools and hardware—remember, these grab bars are crucial for your safety.
Step-by-Step Installation Guide
Now that we’ve got our plan and materials ready, let’s walk through the installation process. Taking it step by step will ensure your grab bars are secure and positioned correctly.
Locating Wall Studs
The first and most crucial step is finding the wall studs. Grab bars need to be anchored to something solid to hold your weight safely. Here’s how to locate those studs:
- Use a stud finder to scan the wall where you want to install the grab bar.
- Mark the center of each stud with a pencil.
- Double-check your findings by tapping the wall lightly—studs will sound solid, while hollow areas will have a different tone.
- If you can’t find studs where you need them, you’ll need to use special anchors rated for grab bar installation.
Take your time with this step—it’s the foundation for a safe installation.
Marking and Drilling Pilot Holes
Once you’ve located your studs, it’s time to mark where you’ll drill:
- Hold the grab bar against the wall at the desired height and angle.
- Use a level to ensure it’s straight.
- Mark the screw holes with a pencil.
- Double-check that your marks align with the studs you found earlier.
- Drill pilot holes at each mark. Use a drill bit slightly smaller than your screws.
If you’re using anchors, follow the manufacturer’s instructions for hole size and depth.
Securing the Grab Bar
Now for the main event—actually attaching the grab bar to the wall:
- Apply a small amount of silicone caulk around each pilot hole for waterproofing.
- Line up the grab bar with your pilot holes.
- Insert the screws and tighten them partially.
- Use your level one more time to ensure the bar is straight.
- Finish tightening the screws until the bar is snug against the wall.
- Wipe away any excess caulk for a clean finish.
Give the bar a firm tug to make sure it’s secure. It shouldn’t budge at all.
Safety Checks and Maintenance
Congratulations! You’ve installed your grab bars. But we’re not quite done yet. Regular checks and maintenance are key to keeping your grab bars safe and effective over time.
Testing Your Newly Installed Grab Bars
Before you start using your new grab bars regularly, it’s important to test them thoroughly:
- Grasp the bar firmly and pull on it from various angles.
- Put your full weight on the bar (carefully!) to ensure it can support you.
- Check for any movement or creaking sounds that might indicate a loose installation.
If you notice any issues, don’t use the grab bar until you’ve addressed the problem. It might mean tightening screws or, in some cases, reinstalling the bar.
Regular Maintenance Tips
To keep your grab bars in top shape:
- Clean them regularly with a mild soap and water solution. Avoid harsh chemicals that could damage the finish or make the surface slippery.
- Check the screws monthly to make sure they haven’t loosened. Tighten as needed.
- Inspect the area around the grab bar for any signs of water damage or mold, especially in bathrooms.
- If you have rubber grips on your grab bars, replace them if they show signs of wear or damage.
- Pay attention to how the grab bar feels when you use it. If it ever feels less stable, investigate immediately.
By staying on top of maintenance, you’ll ensure your grab bars remain a reliable safety feature in your home for years to come.
When to Call in the Pros
While many people can successfully install grab bars themselves, there are times when it’s best to bring in a professional. Let’s talk about when DIY might not be the best route.
Recognizing When You Need Expert Help
Consider calling a professional if:
- You’re not comfortable using power tools or don’t have experience with home improvements.
- Your walls are made of materials other than standard drywall (like tile or concrete).
- You can’t locate studs in the right places and need to use special anchoring techniques.
- You have physical limitations that make it difficult or unsafe to do the installation yourself.
- You’re installing grab bars in a rental property and need to ensure you’re following all regulations.
A professional installer will have the tools, experience, and knowledge to handle these more complex situations safely and effectively.
Finding Qualified Installers
If you decide to go the professional route, here’s how to find a qualified installer:
- Look for certified aging-in-place specialists (CAPS) through the National Association of Home Builders.
- Check with local home health agencies or occupational therapists for recommendations.
- Ask at medical supply stores that sell grab bars—they often have connections with reputable installers.
- Read online reviews and ask for references before hiring anyone.
- Make sure any professional you hire is licensed, insured, and experienced with grab bar installation specifically.
Don’t be afraid to ask questions about their experience and methods. A good installer will be happy to explain the process and address any concerns you have.
Complementary Safety Measures
While grab bars are a fantastic start, they’re just one piece of the fall prevention puzzle. Let’s explore some other ways to make your home safer and more accessible.
Additional Bathroom Safety Features
The bathroom is often the most dangerous room in the house for seniors. Along with grab bars, consider these add-ons:
- Non-slip mats: Place these in the tub, shower, and on bathroom floors to prevent slipping on wet surfaces.
- Shower chairs: These provide a stable seat for bathing, reducing the risk of falls in the shower.
- Raised toilet seats: These can make it easier to sit down and stand up, reducing strain on your knees and back.
- Handheld showerheads: These allow you to bathe while seated, improving safety and comfort.
- Adequate lighting: Make sure your bathroom is well-lit, including nightlights for those middle-of-the-night trips.
These features work together with your grab bars to create a safer bathroom environment overall.
Whole-Home Fall Prevention Strategies
Fall prevention doesn’t stop at the bathroom door. Here are some strategies for the rest of your home:
- Remove tripping hazards: Clear clutter from walkways, secure loose rugs and tuck away electrical cords.
- Improve lighting: Install bright, easily accessible lights in all rooms and stairways.
- Install handrails: Make sure all staircases have sturdy handrails on both sides.
- Rearrange furniture: Create clear paths through rooms and make sure frequently used items are within easy reach.
- Consider mobility aids: Canes or walkers can provide additional support when moving around your home.
- Wear appropriate footwear: Choose shoes with non-slip soles and good support, even when you’re just at home.
By combining these strategies with your new grab bars, you’re creating a comprehensive approach to fall prevention.
Installing grab bars is a smart move for fall prevention in seniors. With careful planning and proper installation, these simple devices can significantly boost safety and confidence at home. Whether you tackle the project yourself or call in a pro, the important thing is taking action to create a safer living environment. Remember, it’s not just about preventing falls—it’s about maintaining independence and peace of mind as you age. So go ahead, and take that first step toward a safer home today.